What you will need:
Installation steps
Install BLE Nano 2 Software If you bought a pre-programmed BLE Nano 2, you can skip this step and go directly to soldering. If not, follow these instructions to install the required add-on to the Arduino software. Then download NanoUART 1.2. Unzip NanoUART, start the Arduino software and select Tools->Board->BLE_Nano2. Make sure DAPLink v1.5 is plugged into an USB port, with the BLE nano inserted (the right way!) and and hit the upload arrow. If everything worked, you should be able to open the serial console, set it to 115200 baud, and it should repeatedly say "get_ble_config". If so, you should be good to go.
Solder up serial port and power
Update TeensySaber software You'll need to add these lines to your teensysaber config file: // Max 20 characters #define BLE_PASSWORD "your password" // Max 32 characters. #define BLE_NAME "Your Saber Name" // Max 9 characters #define BLE_SHORTNAME "Saber"Then upload the new code to the saber. (instructions here)
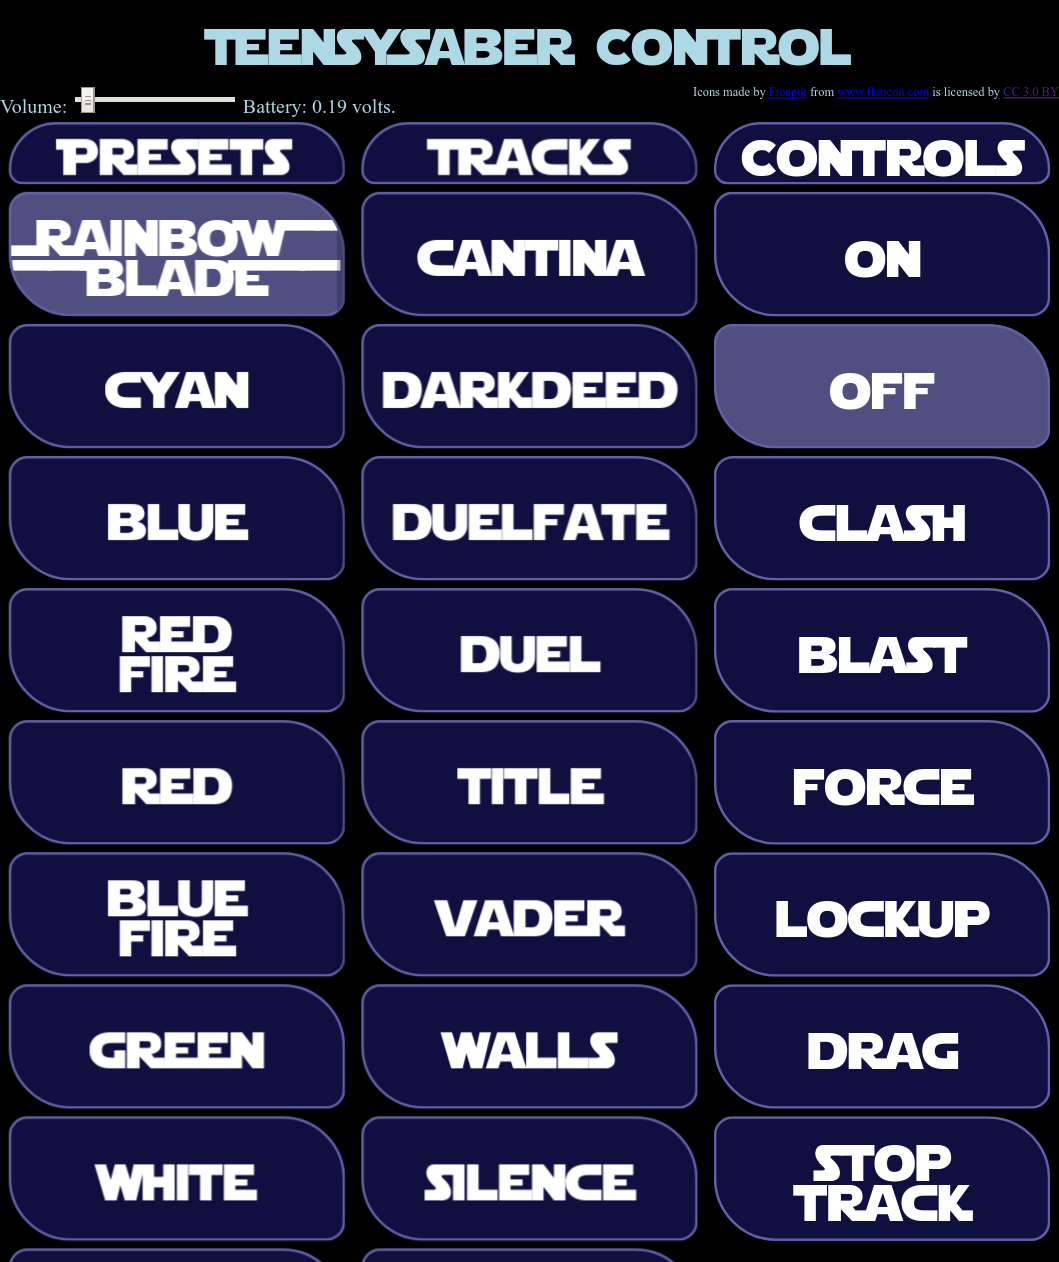
Run and/or install the app Here is a screenshot of what the app looks like:  The app uses web-bluetooth, which is supported on many, but not all platforms on some platforms you'll need to make some configuration changes before it works, instructions for most platforms can be found here. The app is of course open source and hosted on github, so if you want to make your own version, simply go to the github repository, clone the app and have a ball.
Troubleshooting
Last modified: November 6th, 2018 - Design by Monica & Fredrik Hübinette |
||||||||||||||||||||||||||
